Photo to Poster | Photo Editing | Poster Design | Photoshop Tutorial


Photo to Poster | Photo Editing | Poster Design | Photoshop Tutorial


How to Design Poster Using Dumb/Scratch Photo

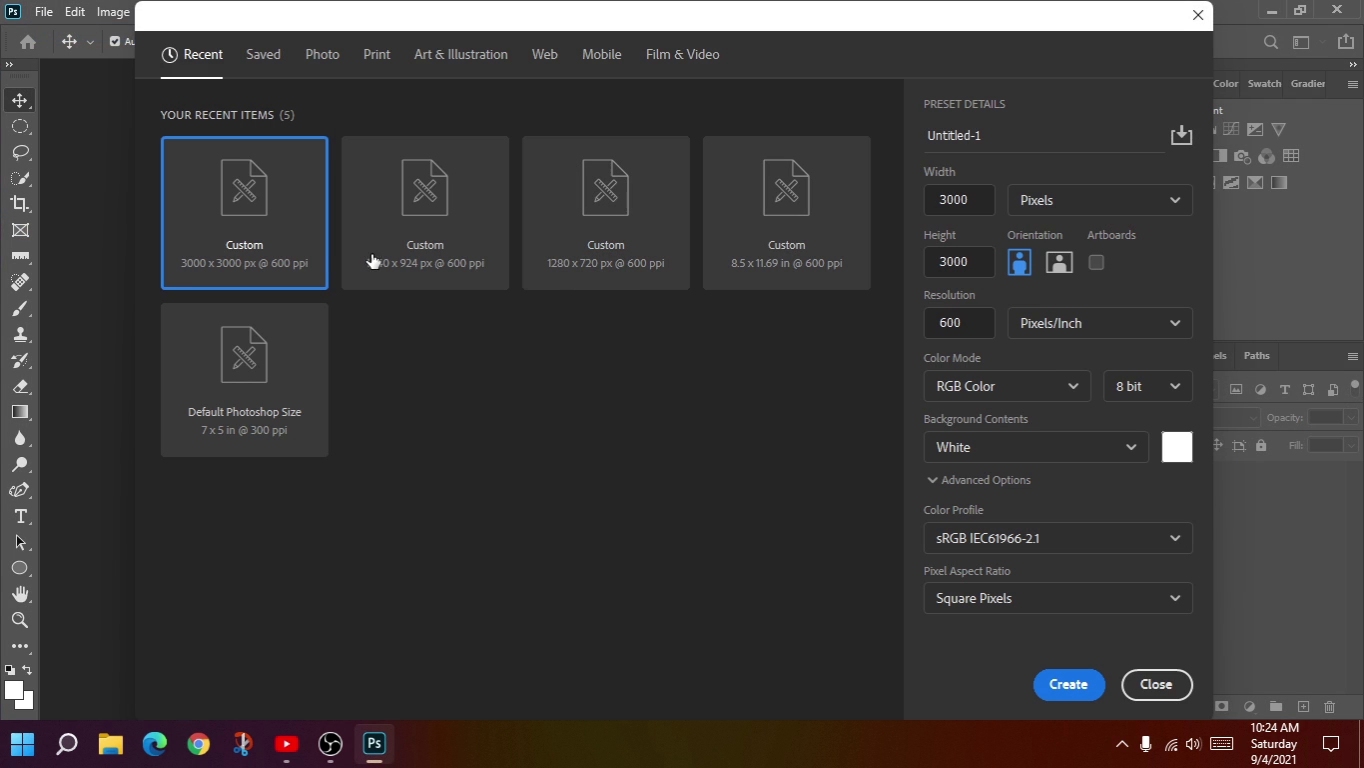
1. Set a Square Artboard Normally 3000x3000 Pixels by Clicking File>New. After all you can also change size to 9:16 Portrait and Landscape according to your requirements.

Photo to Poster | Photo Editing | Poster Design | Photoshop Tutorial


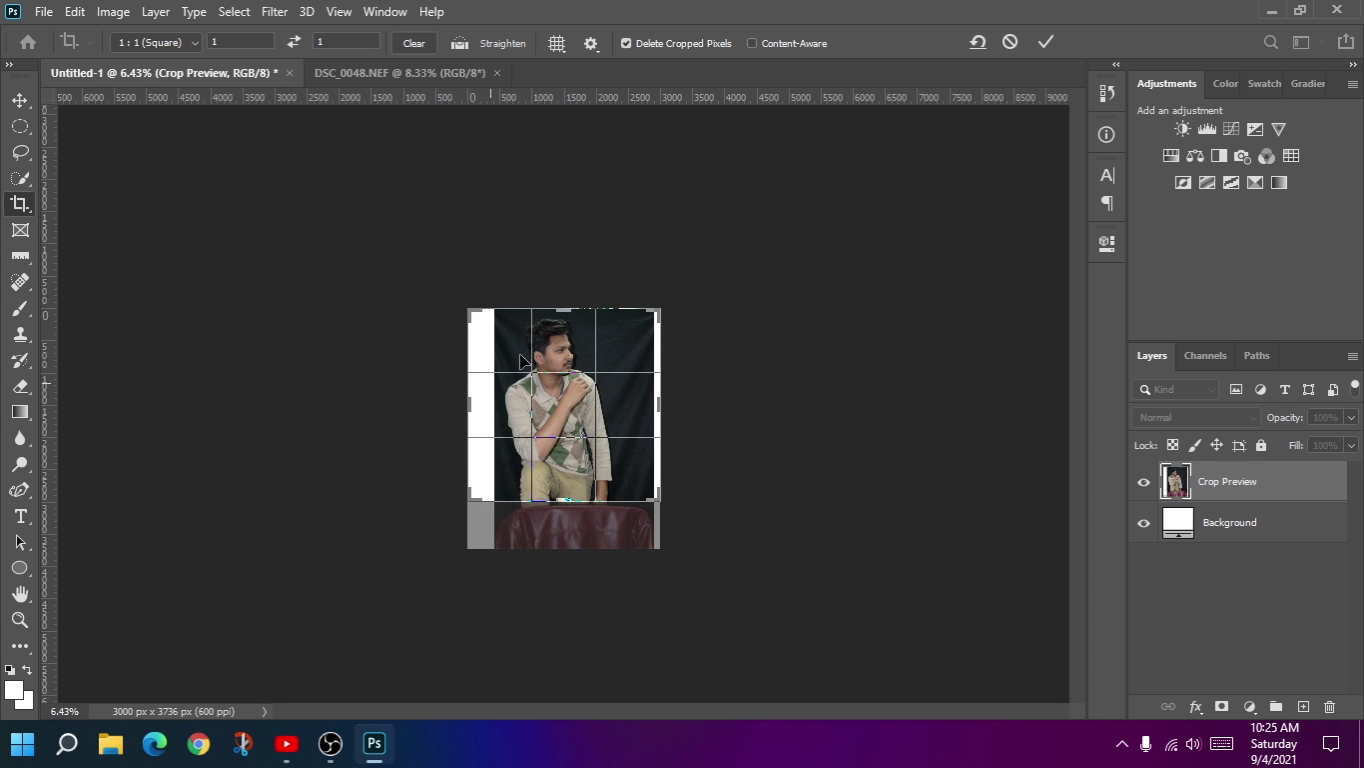
2. Import your image by clicking File>Open and Remove Spare Area by Selecting Crop Tool from Left Tools Pane in Photoshop.

Photo to Poster | Photo Editing | Poster Design | Photoshop Tutorial


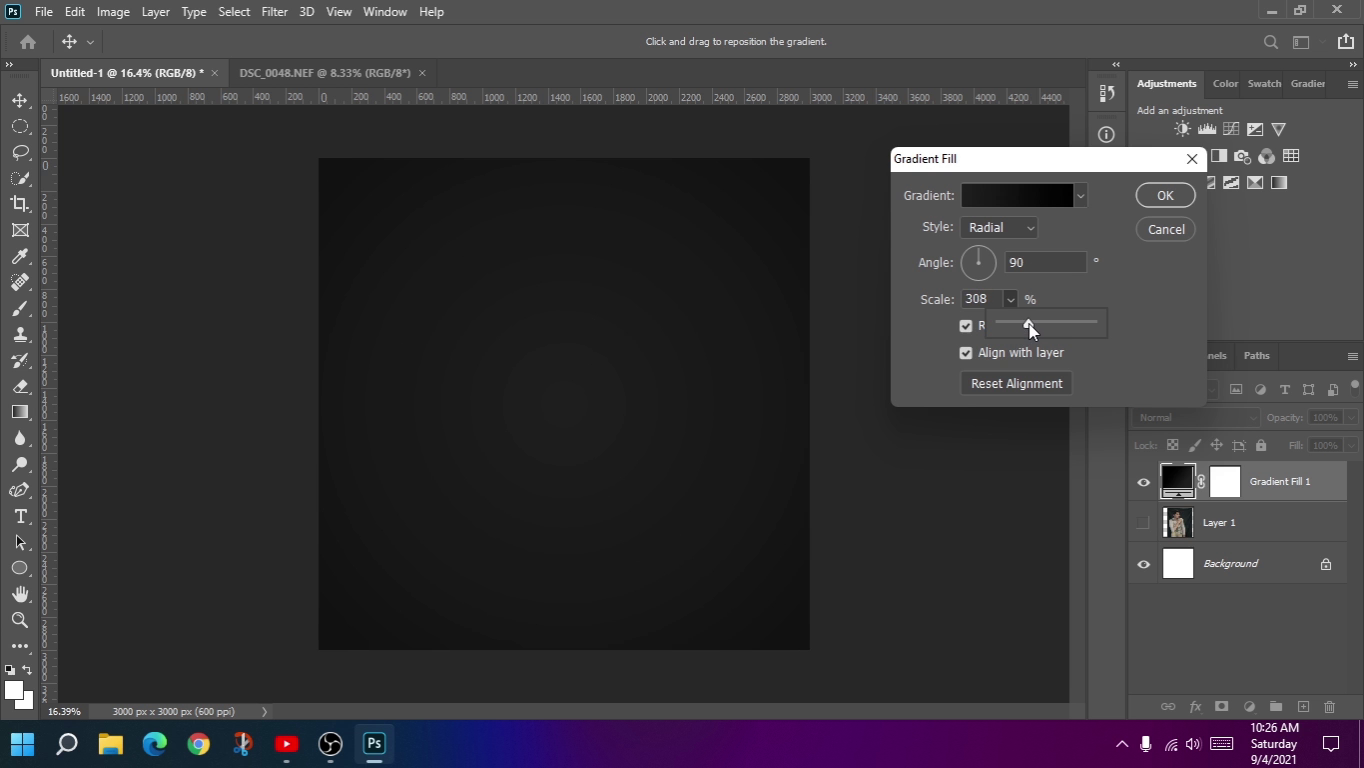
3. Create a Attractive Background Using Gradient from Blending Option (Double Click or Right Click on layer and Select Gradient).

Photo to Poster | Photo Editing | Poster Design | Photoshop Tutorial


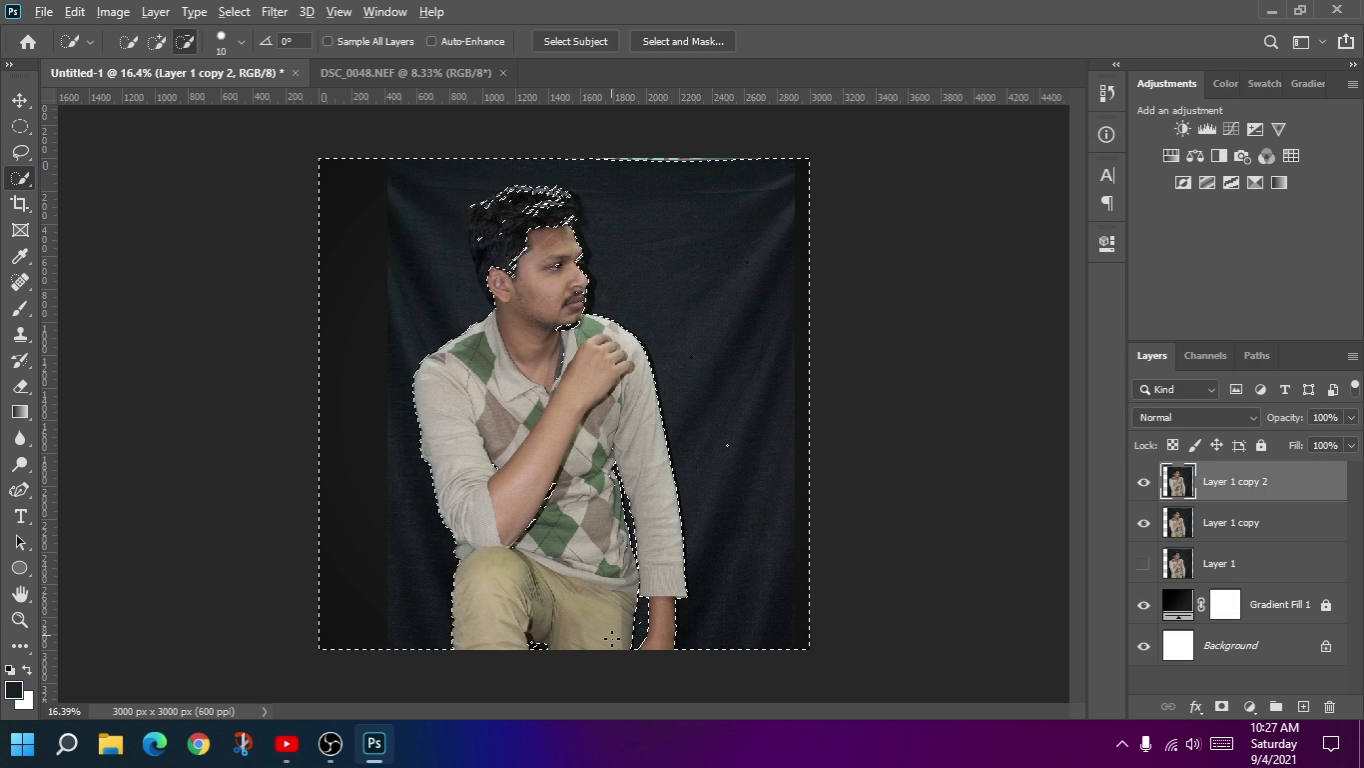
4. Remove Background. I am using Color Range to Remove Maximum Background. You can also Choose Color Range from Filter>Color Range

Photo to Poster | Photo Editing | Poster Design | Photoshop Tutorial


5. Clear Edges with Rubber Tool from Left Tools Pane of Photoshop.

Photo to Poster | Photo Editing | Poster Design | Photoshop Tutorial


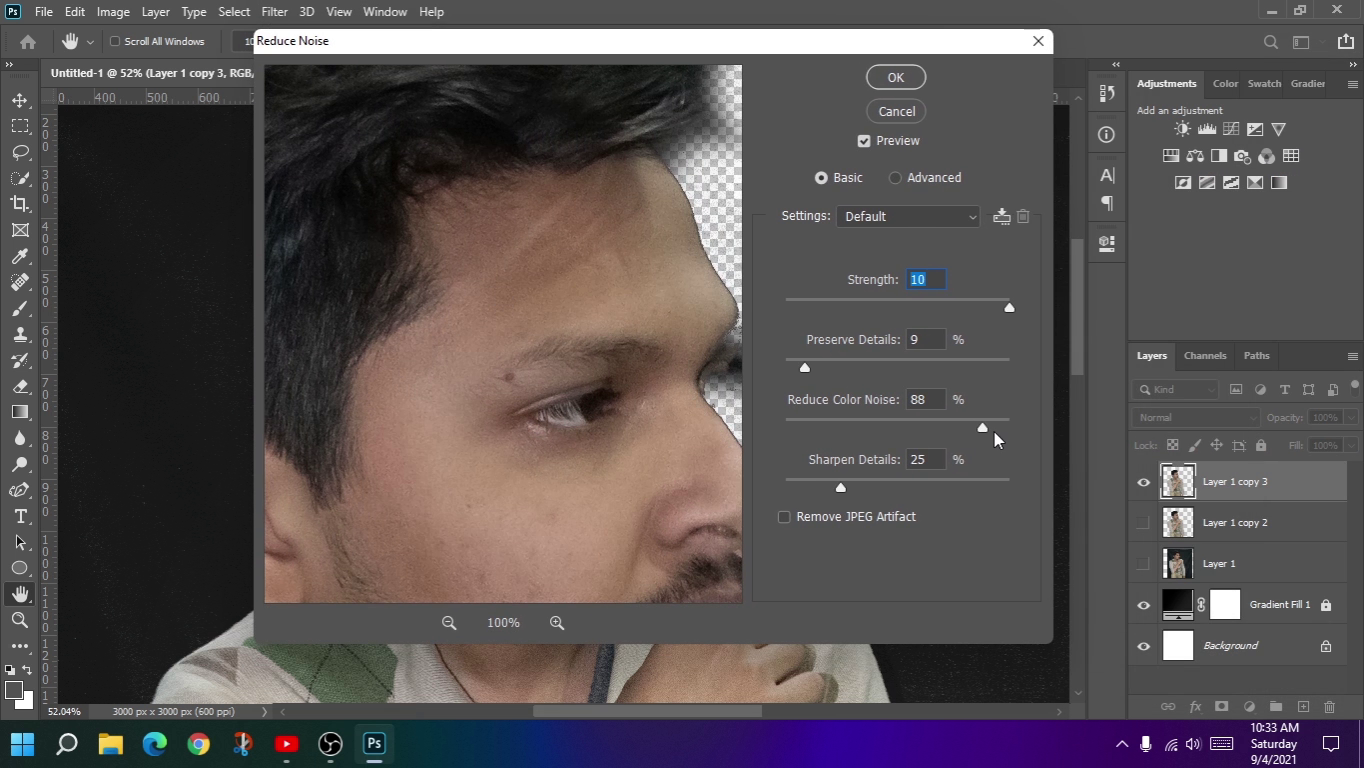
6. Smoothen Skin-1: Make Your Skin Smooth with the help of Reduce Noise Tool by Selecting from Filter>Reduce Noise. And try customize and remove from Small Popup Window.

Photo to Poster | Photo Editing | Poster Design | Photoshop Tutorial


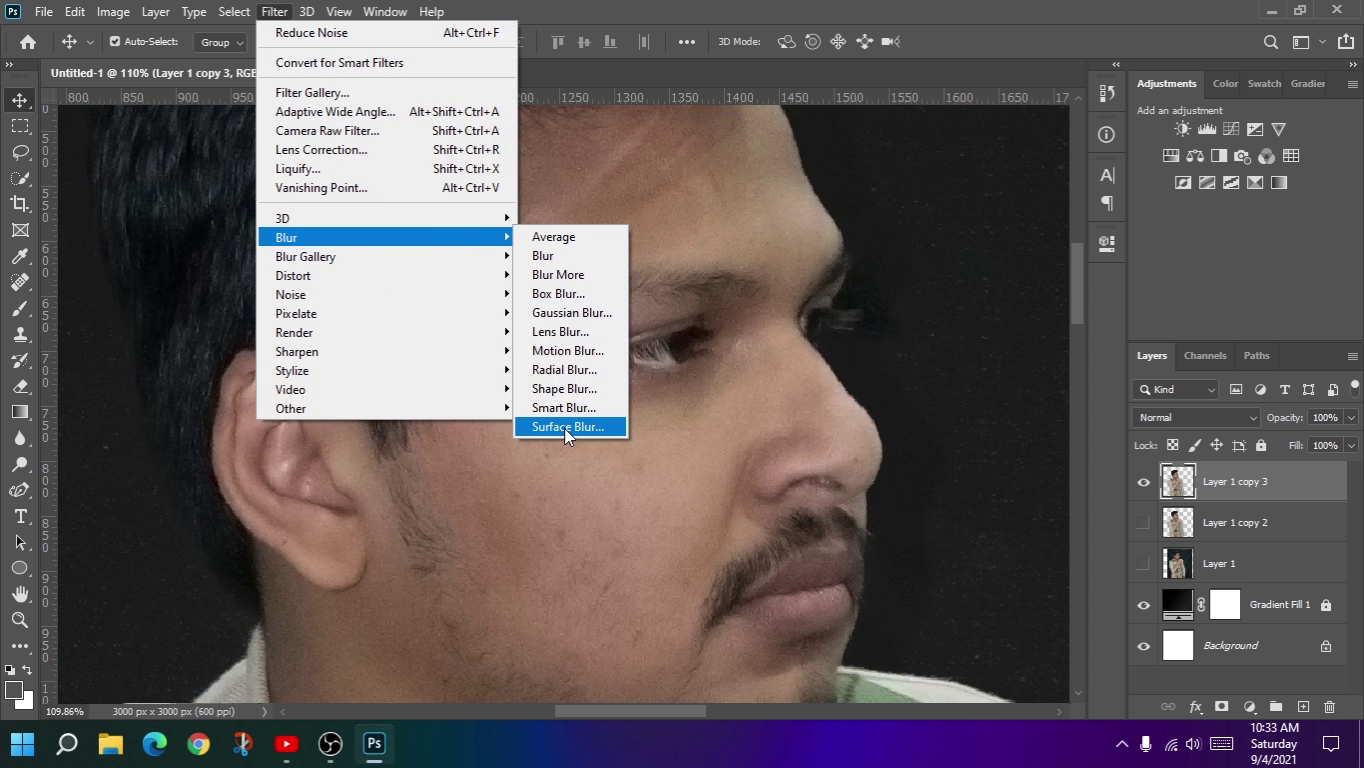
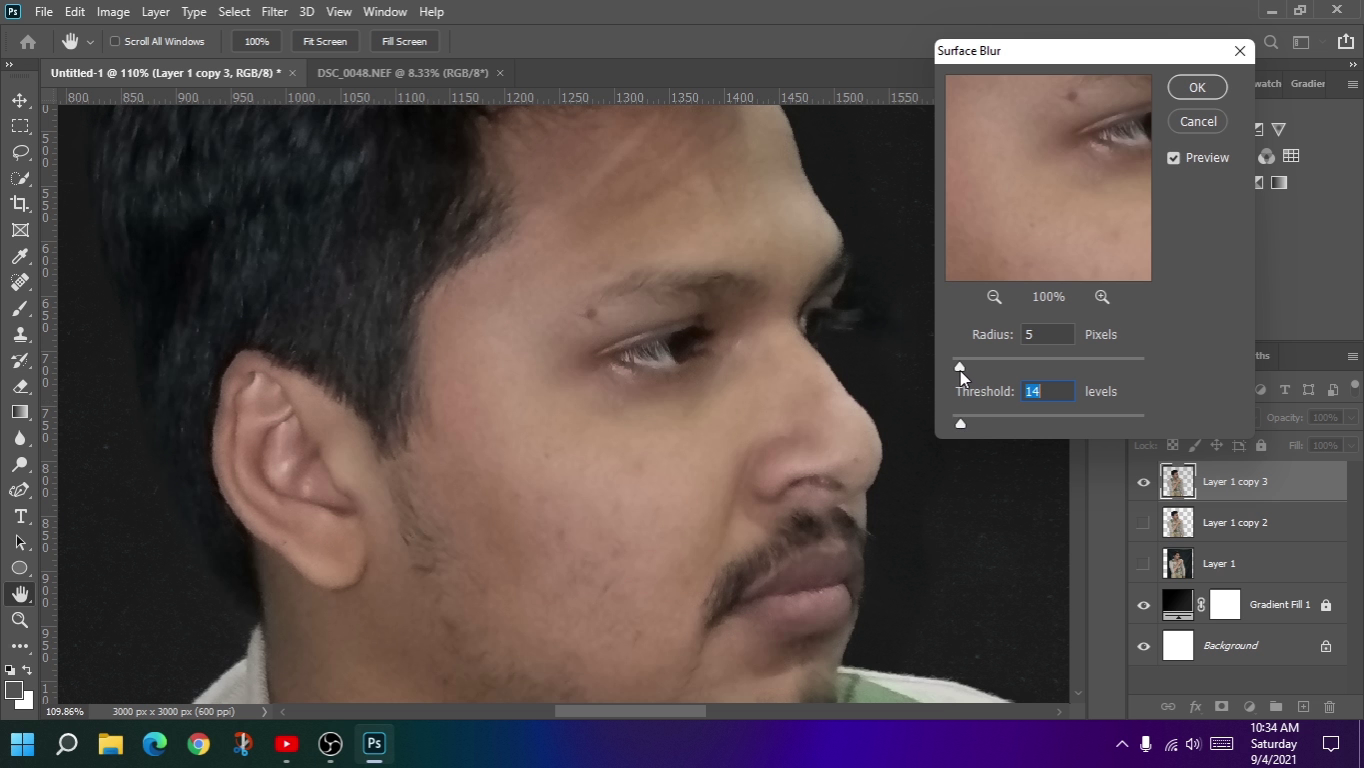
7. Now the next thing to do is Customize Surface Blur. Can be selcect from Filter> Blur> Surface Blur. You can see in image below.


Photo to Poster | Photo Editing | Poster Design | Photoshop Tutorial

Photo to Poster | Photo Editing | Poster Design | Photoshop Tutorial


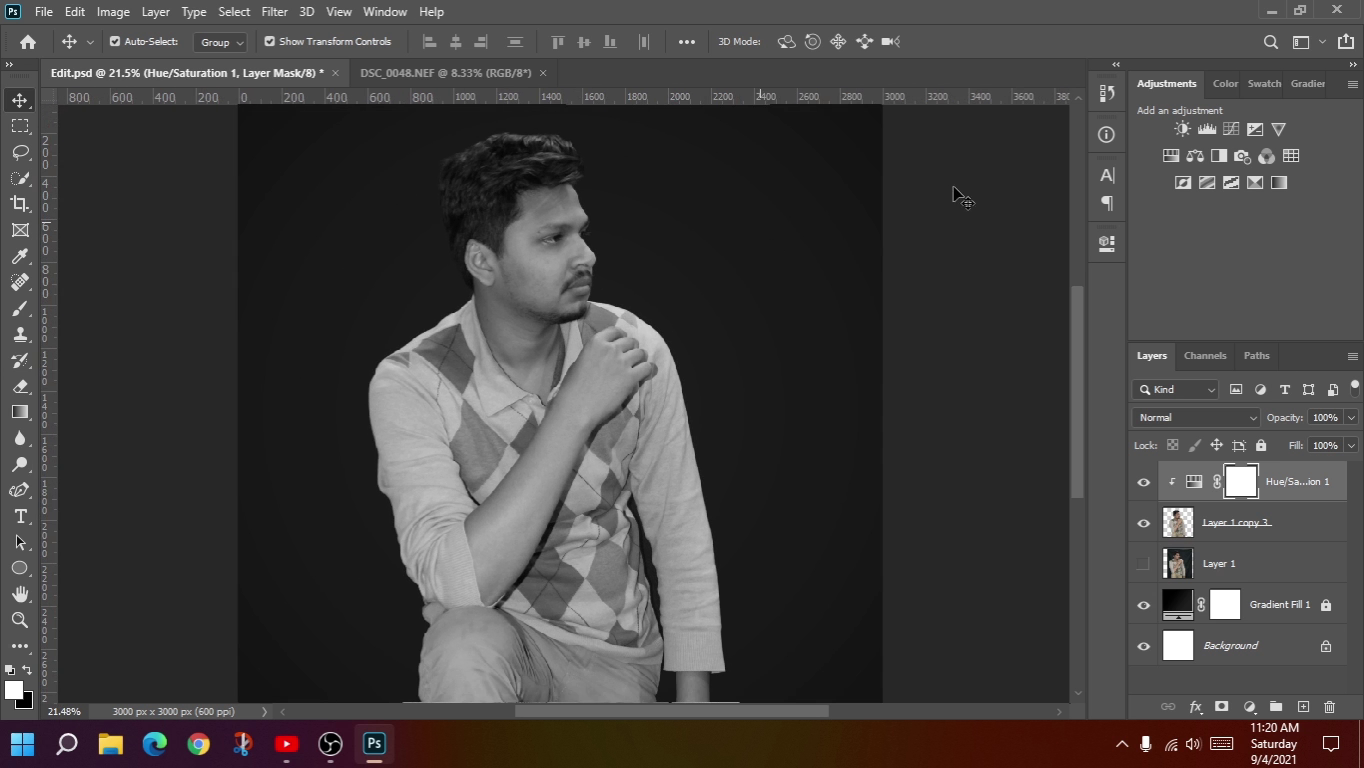
8. Select Hue & Saturation from Adjustment Block and set saturation to 0 to make the image Black & White. You would be find Adjustment block from right section or also make it appear from Windows> Adjustments from Top Application Bar.

Photo to Poster | Photo Editing | Poster Design | Photoshop Tutorial


9. Now Level again from Adjustment Block and try to customize at best combination with background. Again make Adjustment Block appear from Windows> Adjustments from Top Application Bar if haven't.

Select Hue & Saturation from Adjustment Block and set saturation to 0 to make the image Black & White. You would be find Adjustment block from right section or also make it appear from Windows> Adjustments from Top Application Bar.


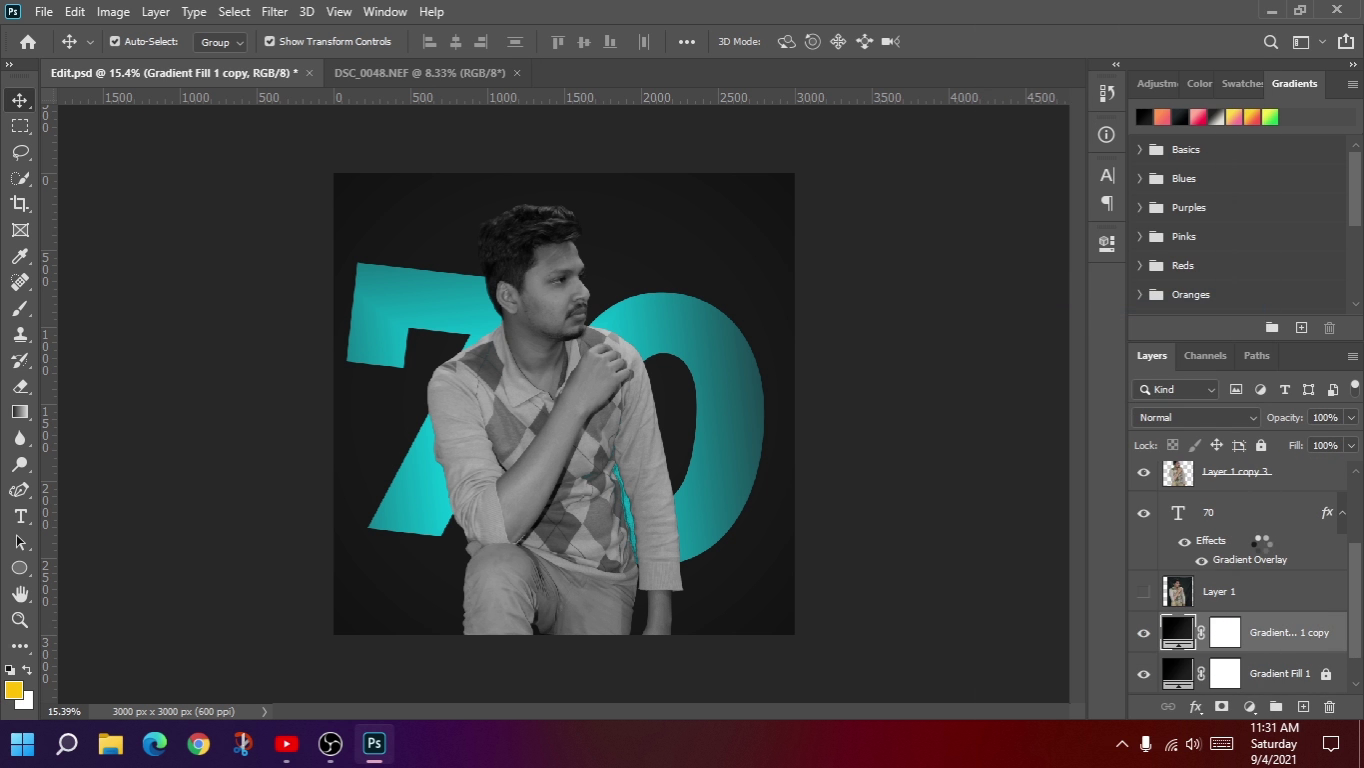
10. Now write and adjust your text in Background. And also can adjust one at Foreground. Butt Keep in mind it will not too light and too dark in my case i used a Gradient on my text.

Photo to Poster | Photo Editing | Poster Design | Photoshop Tutorial


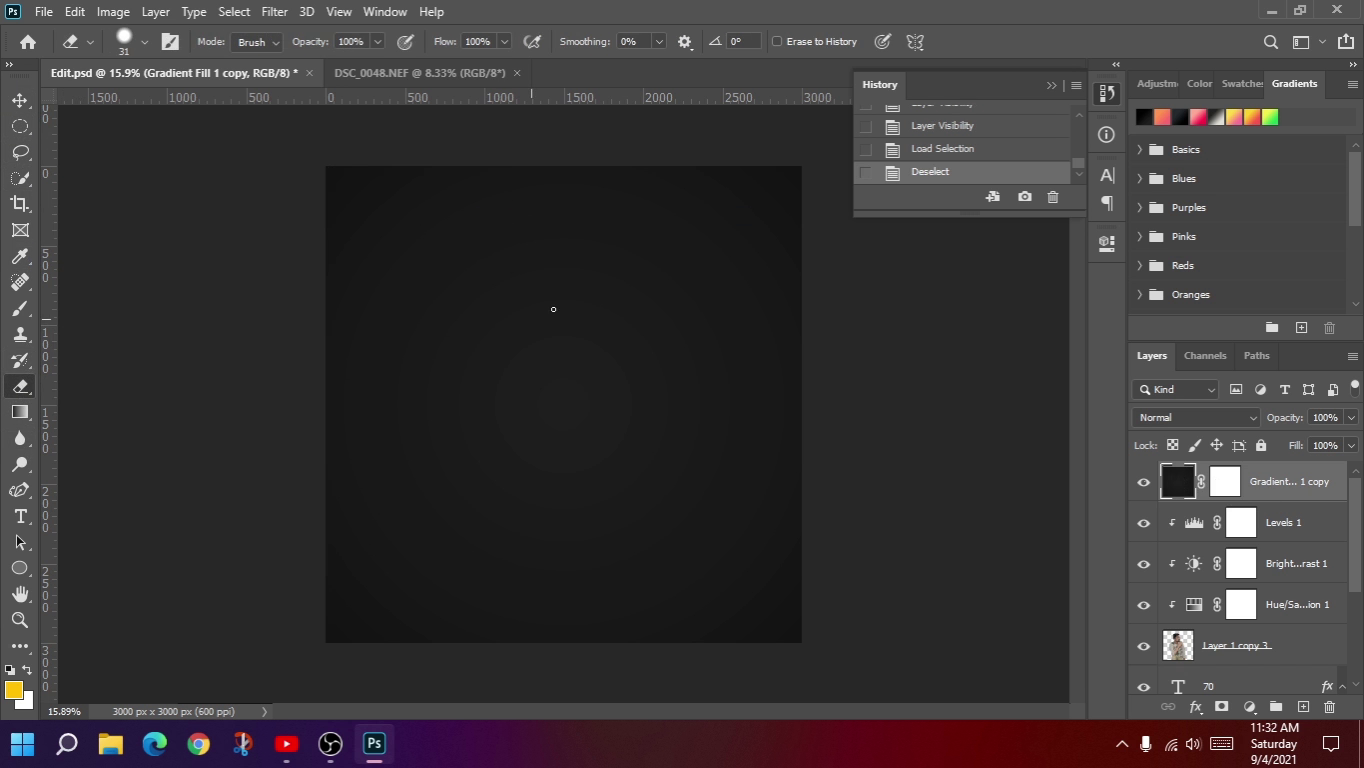
11. Make your background layer Rasterize and drag to top in Layer Section, Mostly found in Right Down side of your screen and erase with rubber tool. make sure your rubber's hardness will be at 0.

Photo to Poster | Photo Editing | Poster Design | Photoshop Tutorial


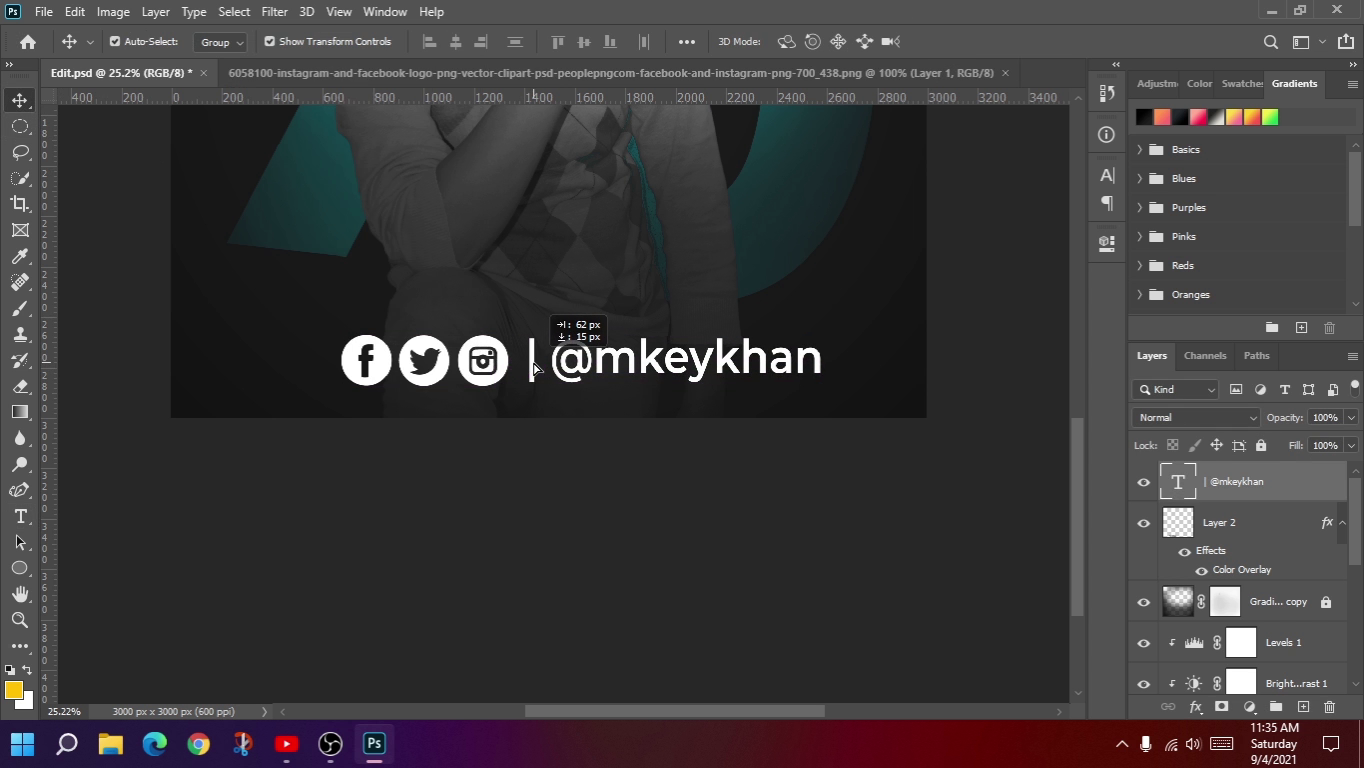
12. Now import social media icons and set with your Sense in Right, Left or in Center Side. I set them in center of image with my username @mkeykhan.

Photo to Poster | Photo Editing | Poster Design | Photoshop Tutorial


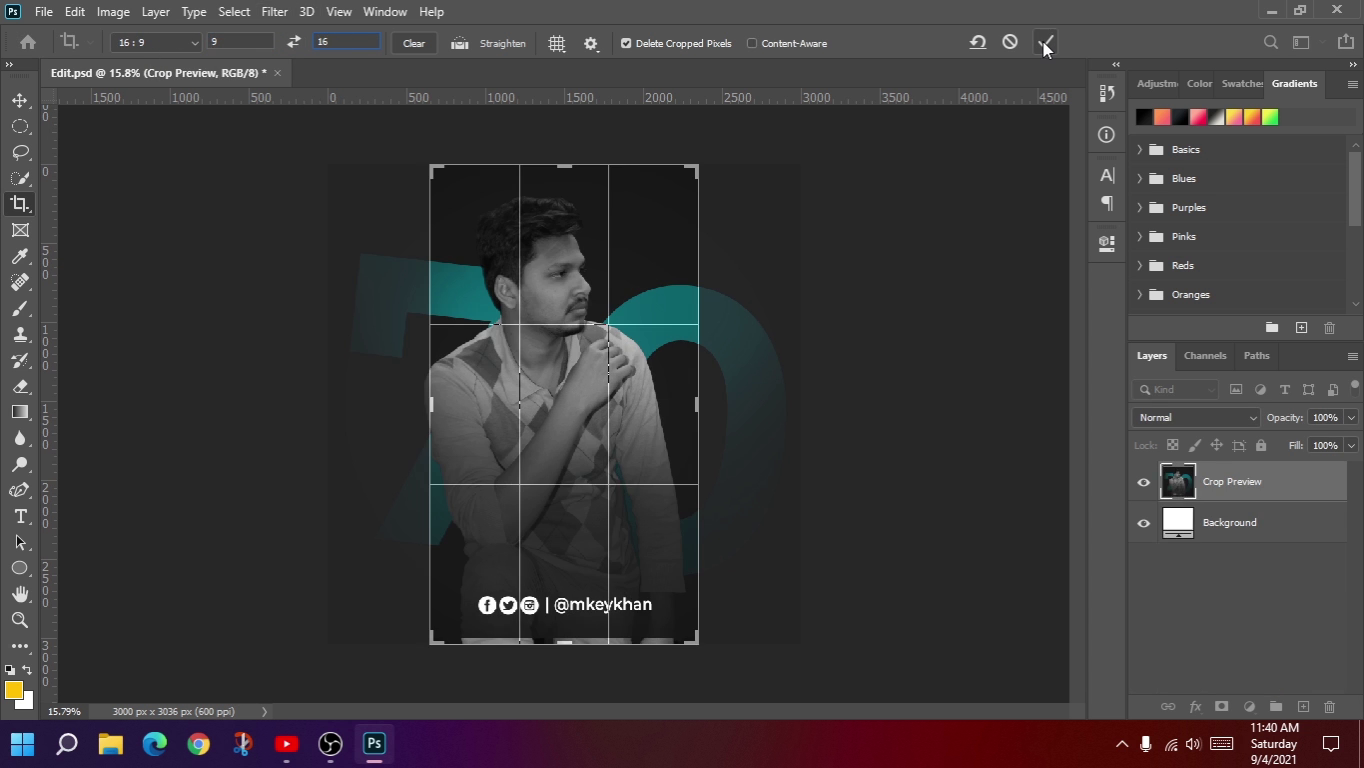
13. Square is a Universal for Social Media Posters butt for multiple uses crop in various sizes e.g. 9:11, Portrait and Landscape .

Photo to Poster | Photo Editing | Poster Design | Photoshop Tutorial


For more info Watch Video Tutorial. And Don't forget to Subscribe my Channel @mkeykhan.


Or Contact on Instagram
@mkeykhan
Kaleem Khan

I'm Kaleem Khan Citizen of Pakistan. Student Of Bachelor of Computer Science at the Virtual University Of Pakistn.

Post a Comment

Please Don't Advertise or Spam Links and Messages Here.

Previous Post Next Post

Recent Posts

Recent Posts